

How to Make an Easy Orange Garland DIY!
Hey there, friends!! It's a beautiful Fall day in the neighborhood, and our RV living room is beaming with new pieces hung for the very first time! I managed to not only get some decor up, but to do a simple orange garland DIY! I got so many compliments and questions on Instagram, and it was so easy, that I decided to share "how I did it" here on my blog! "Orange" you glad I'm about to share this easy DIY with you all?! Too “cheesy” for you?! I thought it was a bit “acidic!” Okay, I’ll stop.

What you'll need:
•4 Large Oranges
•Sharp Knife
•Cutting Board
•Parchment Paper
•Cookie Sheet
•Baking Rack
•Large Needle
•Kitchen Twine (I found mine in the kitchen section of Target!)
•Scissors
Directions:

Step One:
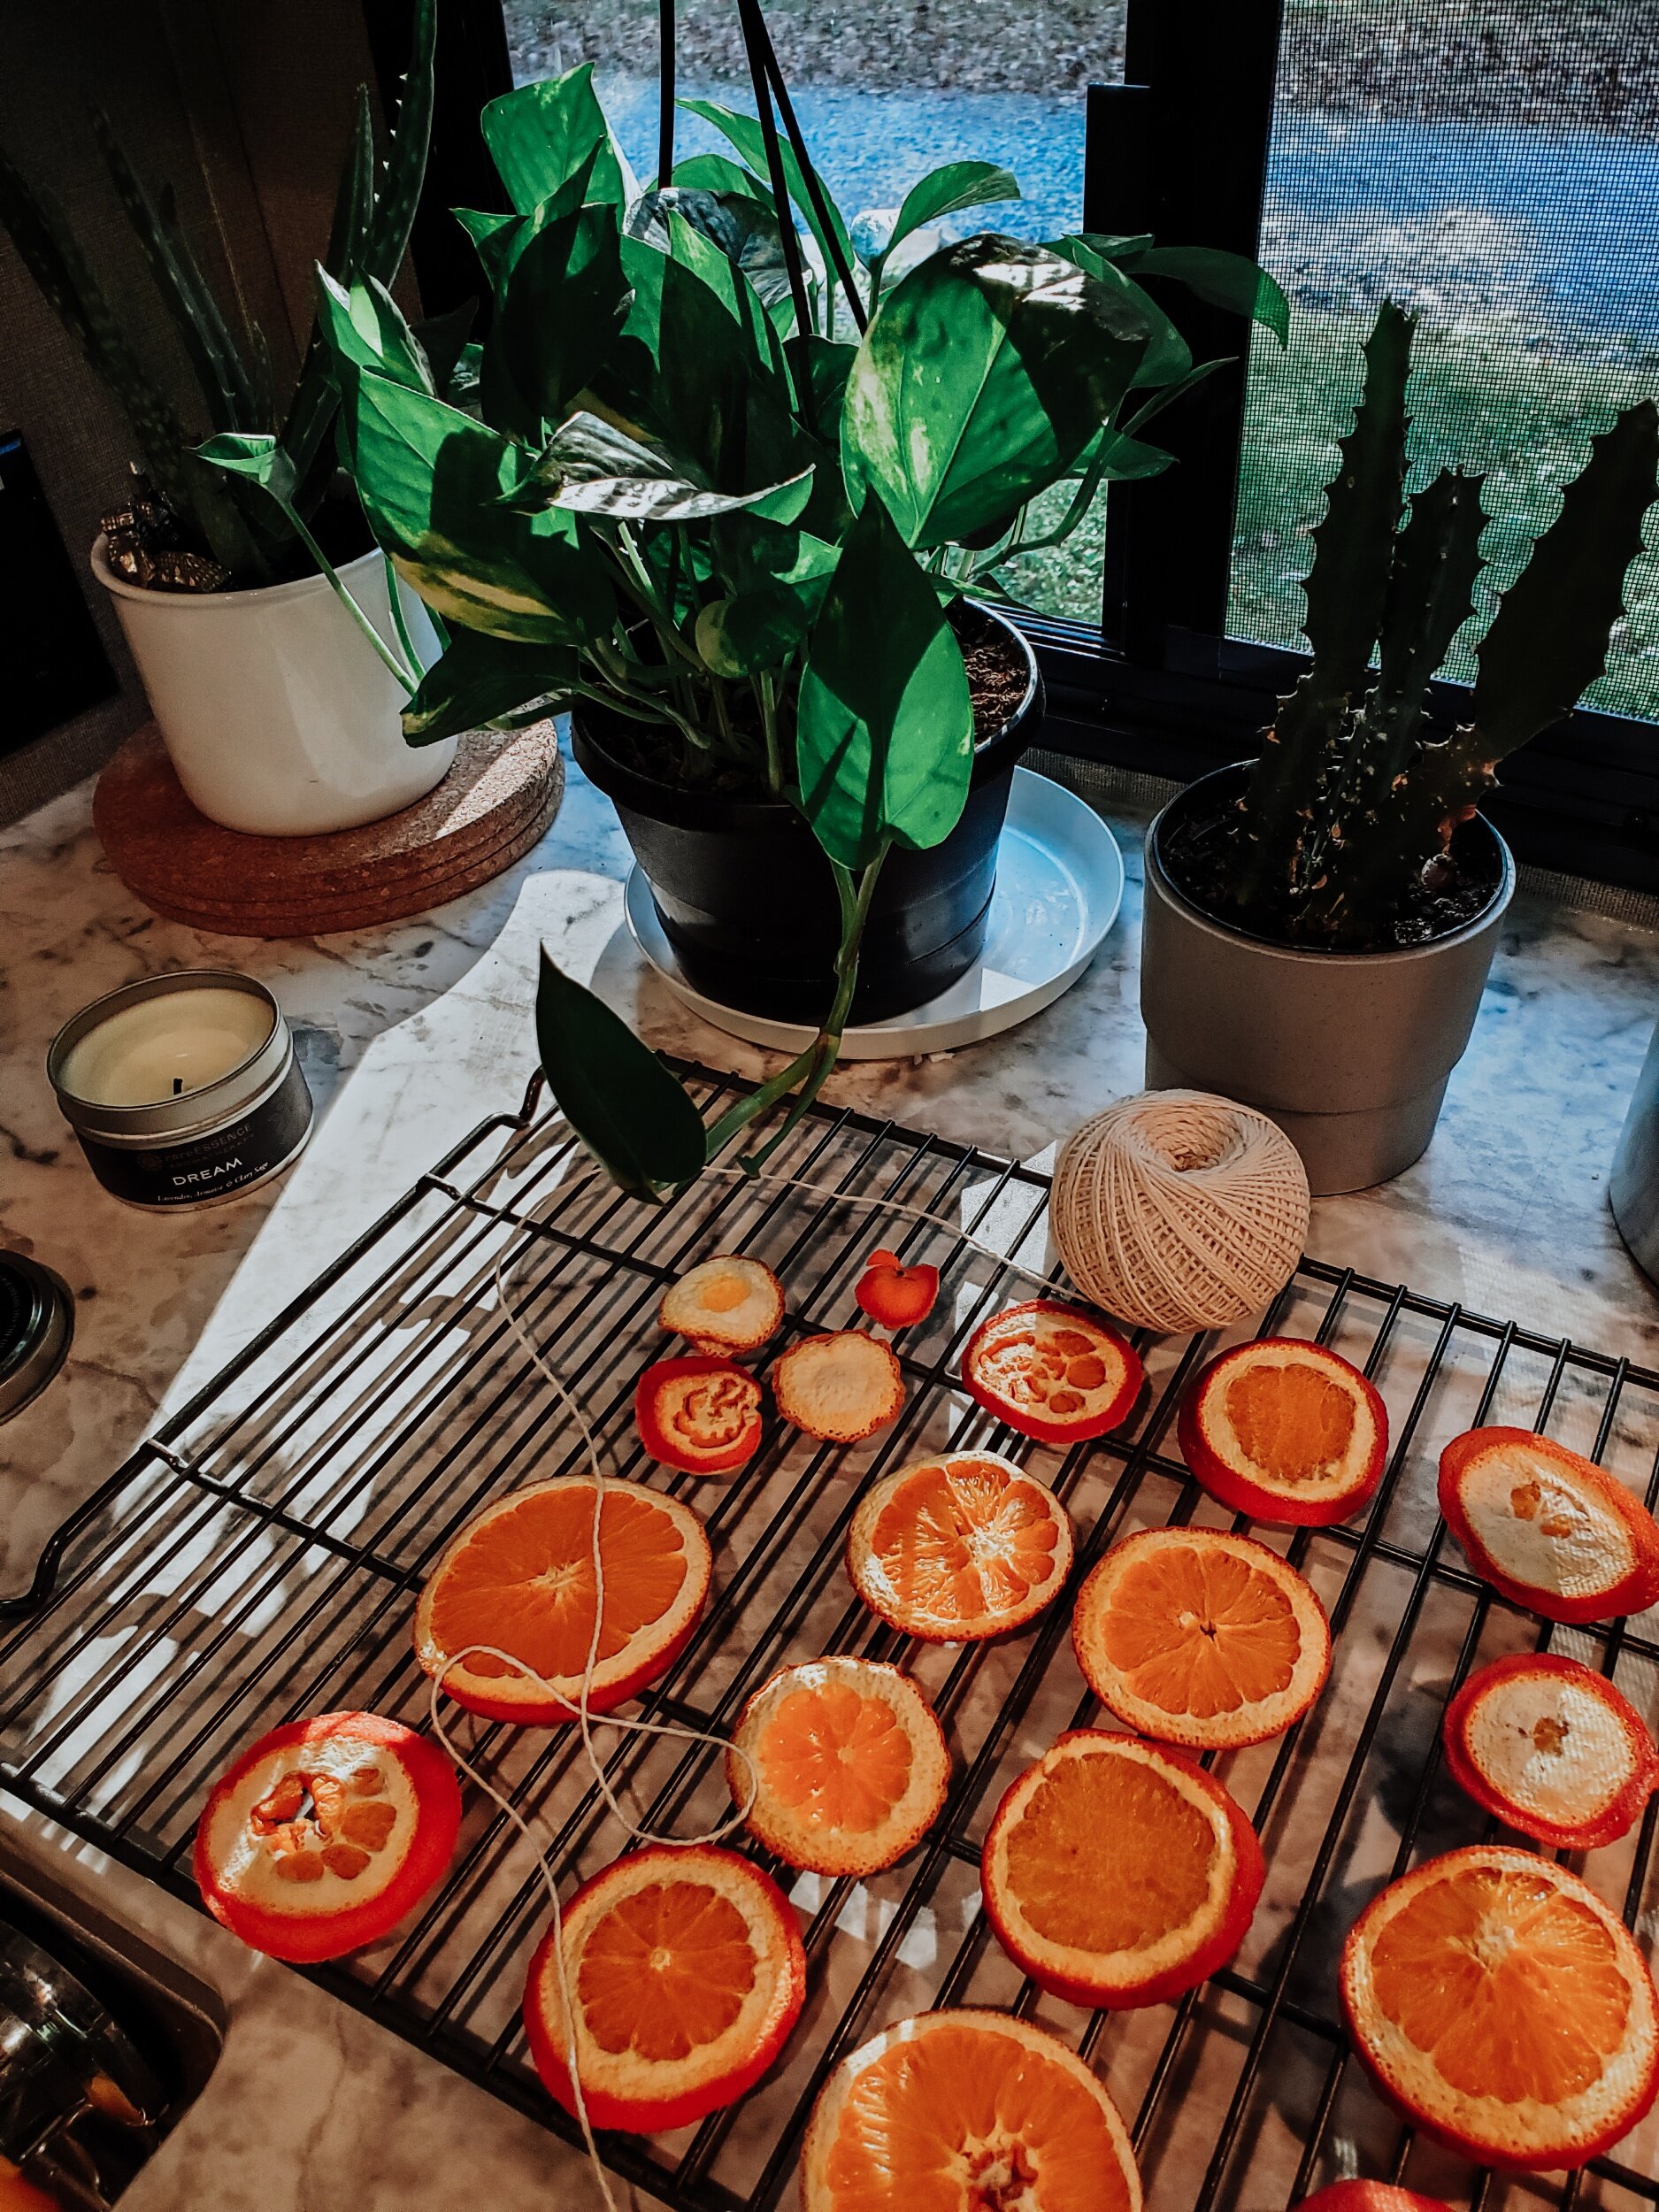
First, rinse your oranges to get off any sticky residue there may be. Then, slice the oranges as thin, yet as in tact, as possible for quicker drying time in the oven! [FYI: I ruined my share of orange slices while cutting, but my goal was to only include slices that were fully in tact without any large holes in the center. The defected oranges...I ATE, and they were DELICIOUS!!!]

Step Two:
Lay the orange slices spread out on top of parchment paper on a cookie sheet, and place them in the oven at 175° for 3-4 hours. [I purposely did this once the kids went to bed so my whole day wasn't shot, but this is also the perfect rainy day activity since each oven may differ in how long this step will take. *You really want to go slow and steady to prevent the oranges from burning!]

Step Three:
Every 30 minutes check in on your orange slices, and rotate them to get an even drying-out, and to avoid burning! [The hotter you make your oven, the more often you will want to check to prevent burning!]
Step Four:
Once dried out, and no longer wet, lay them out on a cookie rack for more drying. [I started this DIY late, so I dried them on the rack overnight!]
Step Five:
The next morning, I took a large needle and some kitchen twine, and threaded through the center of each orange slice. [Because my oranges had fully in tact centers, there was some friction holding the oranges stable along the twine so I could spread them out as desired!]
Step Six:
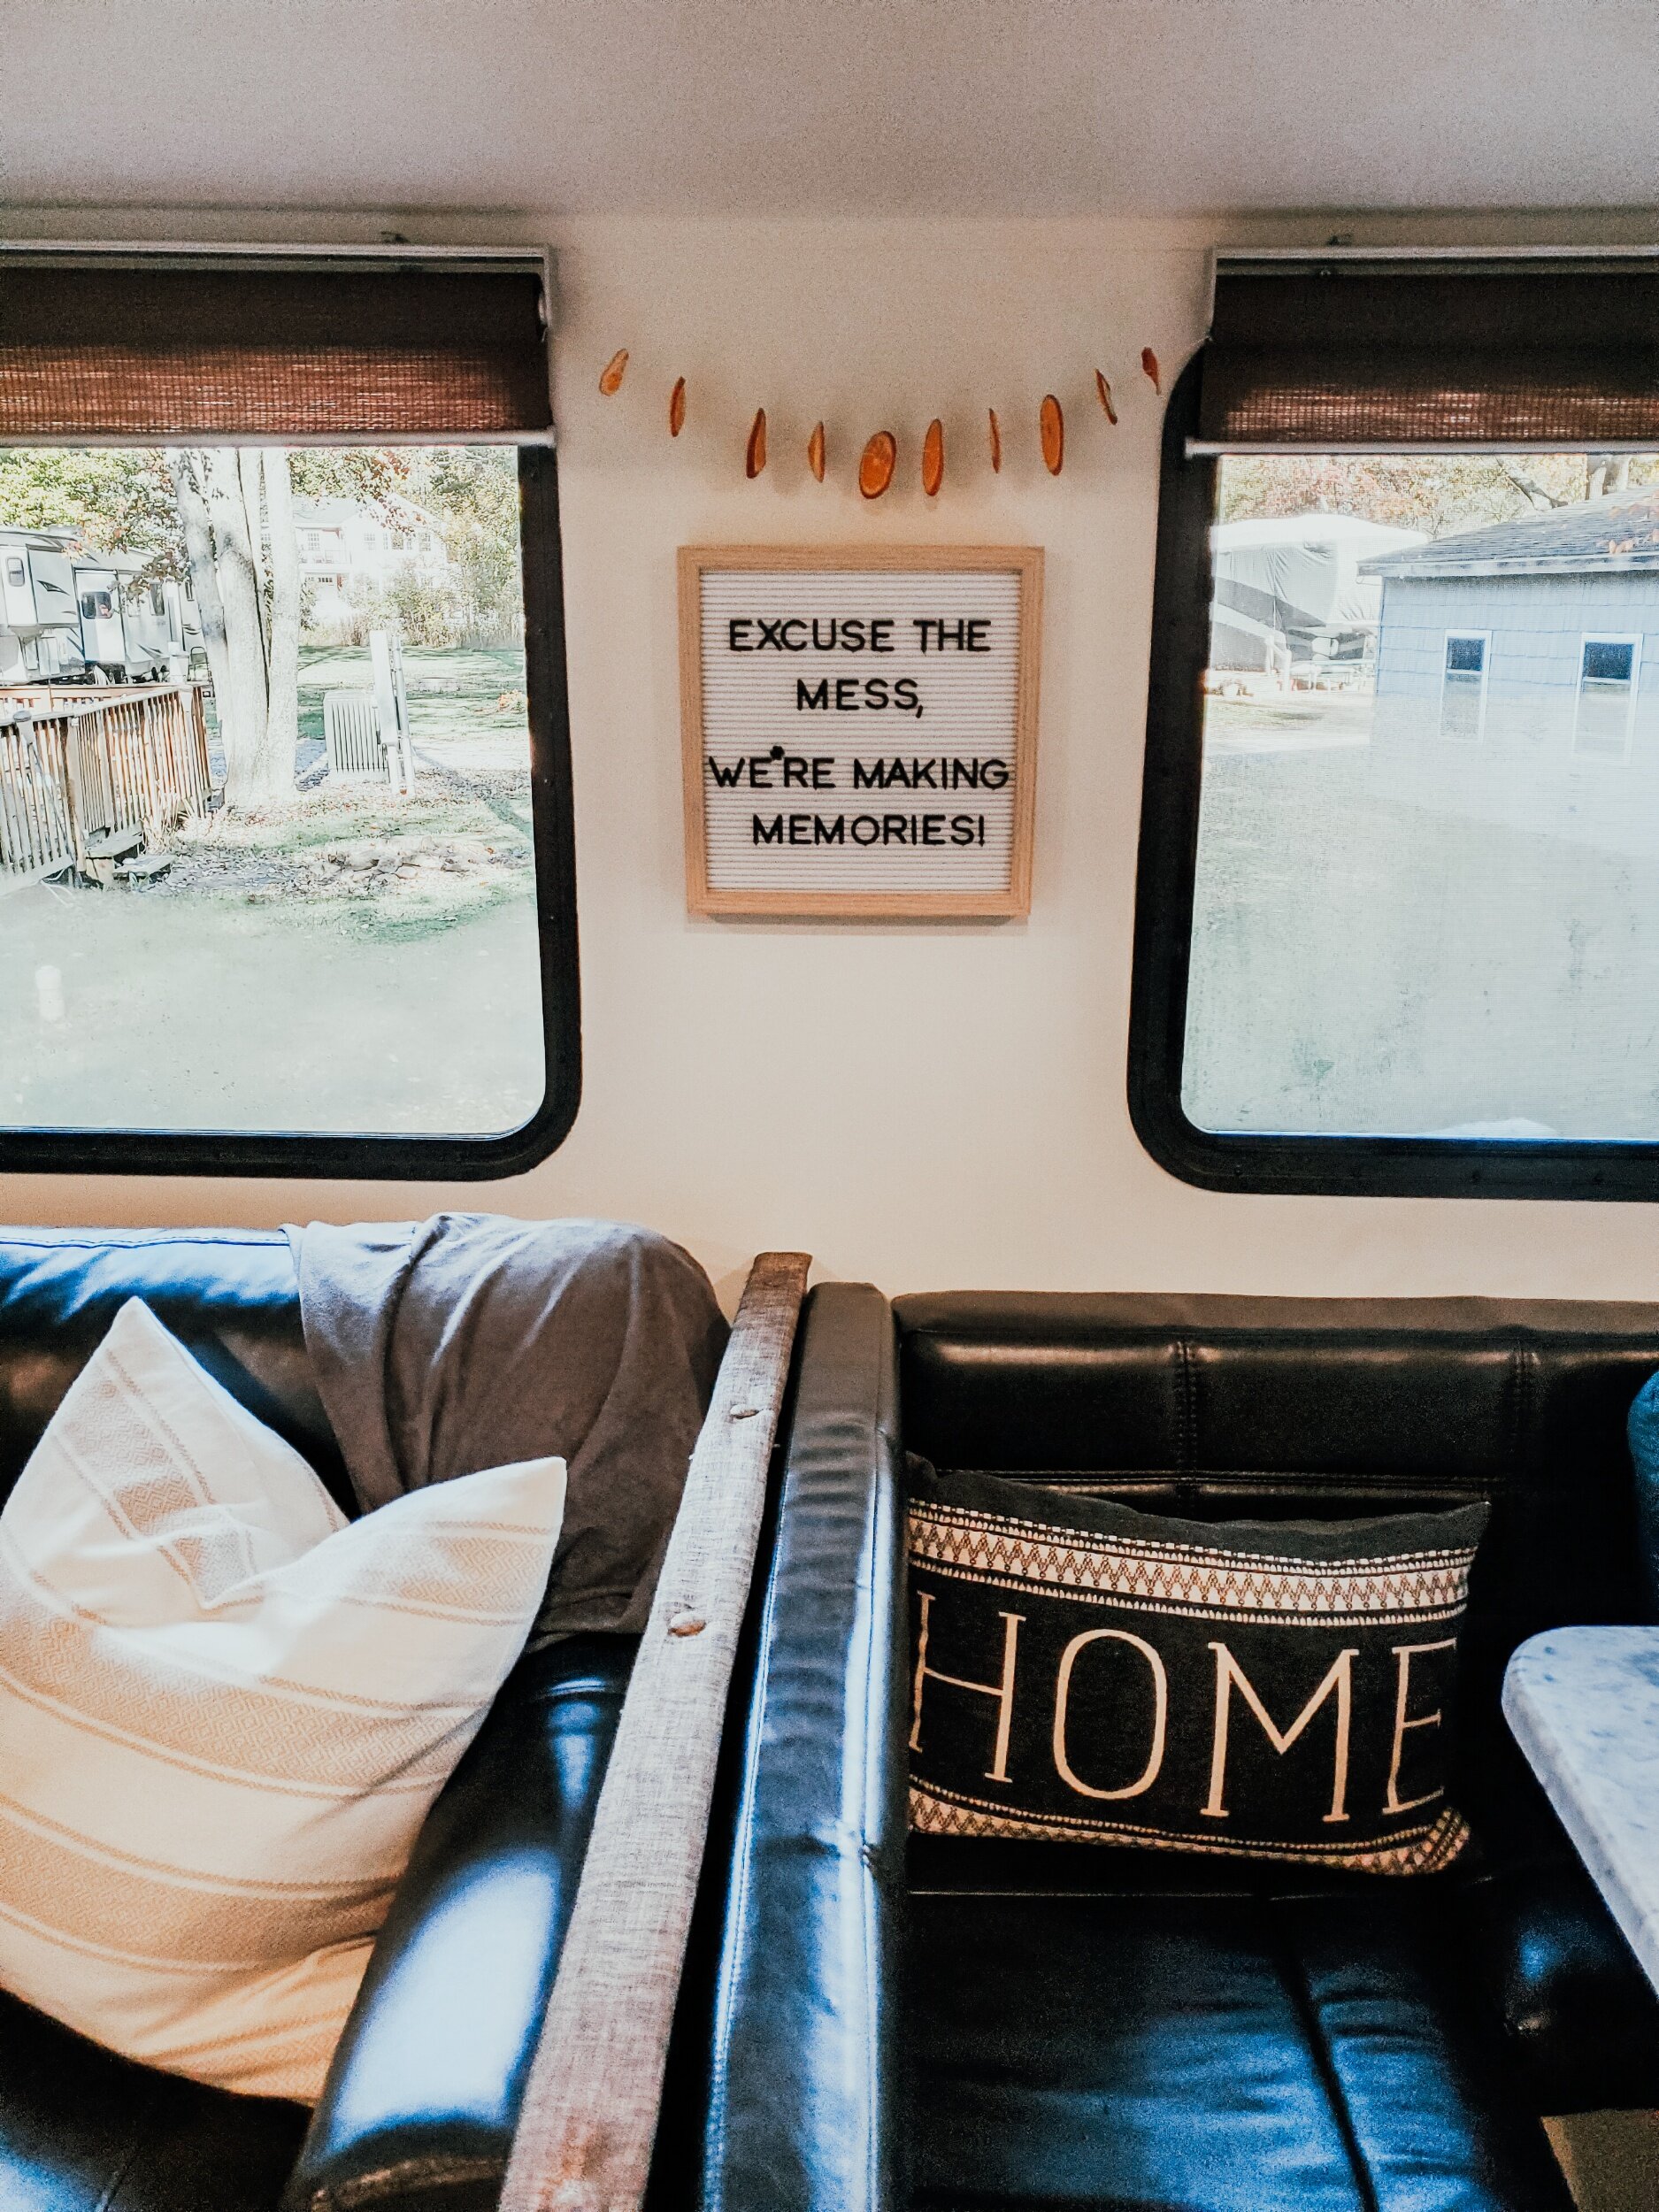
Now that my garland was ready, I decided to skip the command hooks, tacs, or nails in the wall, and I secured them straight to my blinds! I tied my garland at the corner of each blind, and ¡VOILA!, a classic, yet unique orange garland to add some Fall color, smell, and spice to your space!! :-)
How do you think my orange garland turned out? If you try this easy Fall DIY, please tag me on Instagram @coolmomandcollected! I'd love to see, and share how yours turned out with the rest of the IG fam!!
Cool, Calm, and Collectedly Yours,


